How To Make Your Own Shoe Rack At Home
Shoe racks and shoe shelves are a great way to keep your footwear in order and prevent your shoes from ending up scattered all over. You do not have to go out and buy one. Instead, you can make your own shoe rack at home.
In general, disorder and clutter are a waste of time – especially when you are busy. Therefore, you should always find ways in which you can optimize your spaces and keep your things in order.
Here we will look at some ingenious ideas on how to make your own shoe rack at home. We show you that you do not need many materials, that it is easy step by step and that it can be done in no time.
You need to think about that before you start building your own shoe rack at home
Shoes should be stored in a suitable place. It is not just a matter of aesthetics, but also to prevent them from being ruined. You may step on sandals or shoes that are made of delicate materials, e.g. silk or suede.
Therefore , you need to take into account how many pairs of shoes you have, what types they are and how often you use them when you want to make a bookcase for shoes. It is a good idea to group your shoes when sorting them because it makes it much easier to find them when you need to use them.
Where you store your sandals and slippers is not the same place you store your boots. And shoes for sports and the ones you use most often must be placed so that they are easy to find and get hold of.
By using a shoe rack when you sort them, you know how many shoes you have and where to find them. Do not miss our recommendations. It’s time to get creative.
1. How to make your own shoe rack at home from old pallets

You can make your own shelf for shoes from pallets. You can easily find them in hardware stores and in any supermarket, or other stores that sell beverages.
Today, it is very popular to use pallets with all sorts of interior design purposes because they have a very original aesthetic and then they are easy to decorate.
You can also use pull boxes from fruits and vegetables.
The number of pallets you need, of course, depends on how many shoes you have. In addition, you should also have a free wall in your home where you can place the pallets. It will look really nice if you make it stand out on display.
Materials:
- Hammer
- Sandpaper for wood
- 1 or 2 pallets (depending on how many shoes you have)
- Paint or varnish (Depending on what you think looks nice and how you want to decorate your bookshelf for shoes)
Building instructions:
- Use hammered to remove every other board from the horizontal side. Do not remove them from the sides. The result should be a too for picture frame.
- Use the hammer to remove exhibiting nails.
- Use sandpaper to sand the pallets thoroughly.
- Paint to taste. One suggestion is to make it retain its natural color and varnish it. You can also paint and then varnish.
- When it is dry, you can place it where you want. The idea is that it is part of your wall as it looks like a picture frame.
Wooden shelf for your shoes
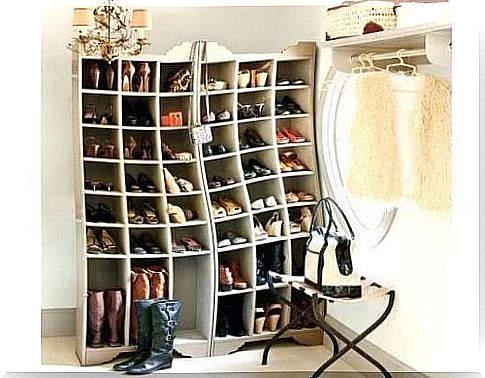
Another way you can make your own bookshelf for shoes is by utilizing old wooden or metal bookshelves. Of course, this way works just as well as a regular closet, but they are more exhibited, which in some cases is nice – also in relation to guests.
The good thing is that you can get your shoes up in a good right, without wasting space. In this case, we recommend a free wall, the shelves can be hung.
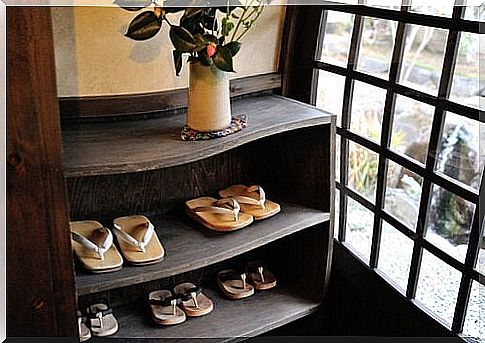
Stairs that are not in use are also a good place to put your shoes. You can paint or varnish the stairs as you like. You can use the steps to support multiple shelves and you can experiment with the size of the shelves.
Materials:
- Square wood or metal, about one meter long.
- Shelf brackets or stairs.
- Nails that can attach the shelves to the stairs.
- Paint or varnish
Construction instructions
- take the pieces of wood or metal and paint or varnish them as you like.
- Measure up where you want them.
- Hang the shelf brackets up (or place them on the stairs)
- Put the shelves on the shelf brackets.
- Place your shoes on the shelves as you want them.
3. How to make your own shoe rack at home from cardboard
The third option is the most useful. It is totally accessible, fun and easy to make. In this case, use cardboard to make your bookshelf into shoes. This is without a doubt a great way to recycle!
The best thing about it is that you can make as many seats as you want. You can make a compartment for each shoe and you can easily add or remove compartments when you need it – you just need more cardboard boxes.
We will construct small triangular spaces where we can place our shoes. This way you do not need a lot of space and you can place them where you want. You can also place them in the bottom of your closet. Below we show you how to make them.
Materials:
- Cardboard
- Measuring tool
- Pencil
- Tape
- Brushes
- Acrylic paint
Building instructions:
- Take a piece of cardboard – about 40 × 40 cm. use a ruler to divide the cardboard into three equal parts. You can resize depending on the size of your shoes. For children is less appropriate.
- Bend the cardboard so that it makes a triangular tube.
- Tape the tube so it stays in shape.
- Paint it in the color you want – both inside and out.
- Make a horizontal row and place the bottom of a cardboard box on top. Add more space in the box if you like.
- Make as many levels as you need.